ShareX - Set Up Screen Recorder Step by Step
When you try to find GPL software of screen recording, you may bump into one called CamStudio on SourceForge. Unluckily, for some reason, some people can't use them record video with sound and its environment setting is complicated. I can't, either. 😕
Fortunately, I found this one after fail on CamStudio. It's ShareX that also use GPL. Here I gonna teach you how to set up the environment for screen recording.
1. First, go to "Task settings"→"Screen recorder"→"Screen recording options".


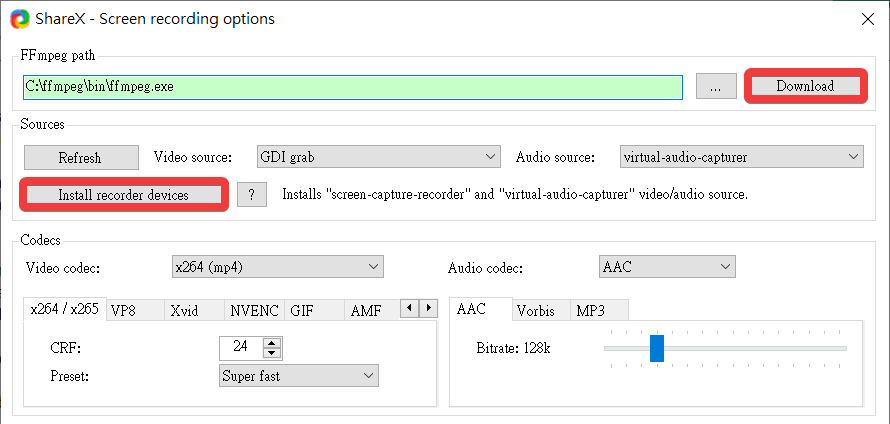
2. Second, click "Download" and click "Install recorder devices".

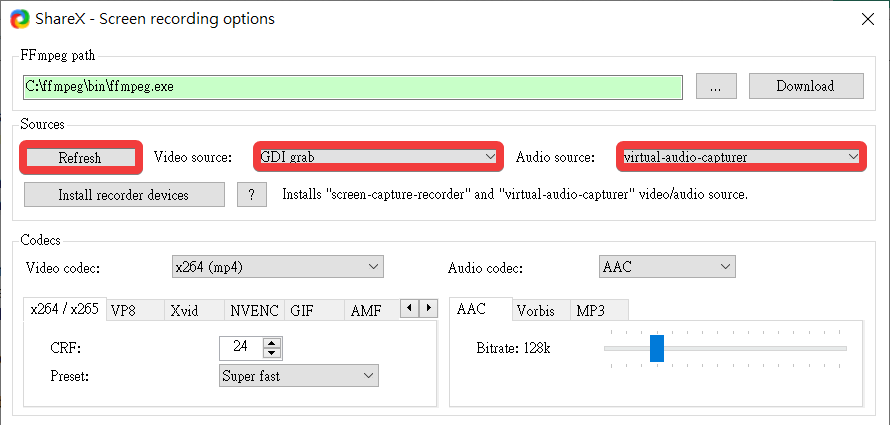
3. Third, refresh and choose "GDI grab" in video source and "virtual-audio-capturer" in audio source. Do not choose "screen-capture-recorder" because it may cause incorrect position of cursor during recording for some reason.

4. Lastly, the key point is here. The ffmpeg file you installed previously would probably NOT work. You may wonder why we still need to install it. Honestly to say, we just want to know the directory of ffmpeg. Download, unzip the Windows build https://www.ffmpeg.org/download.html, and replace the old ffmpeg file. Of course, you can change the path of ffmpeg file as you wish.
If you have any doubt about other settings, you can see mine above. You may also want to know the detail about full screen recording. Just set up hotkey of "Start/Stop screen recording using pre configured region" in hotkey settings. Go to "Task settings"→"Capture", and you will find the pre configured setting in the bottom. Make the width and height be your screen size.
Another question comes up. How to start recording without typing hotkey TWICE. Go to "Task settings"→"Screen recorder" and check the start recording after 0 seconds. That's all I know.

Comments
Post a Comment